
Designing a personalized Hawaiian shirt is easiest when you start with one clear idea. A favorite photo, a pet, a family memory, a team logo, or a travel theme can all work—but the final design should have one focal point instead of too many competing elements.
1. Choose the purpose
Is the shirt for a birthday, a group trip, a company event, or everyday wear? The purpose guides the print, color, amount of personalization, and how bold the final result should be.
2. Start with a high-quality image
Use a clear, well-lit photo. Avoid screenshots, heavily compressed files, or images where the subject is very small. If faces are important, choose a photo with a simple background and enough detail to remain recognizable in print.
3. Pick a print direction
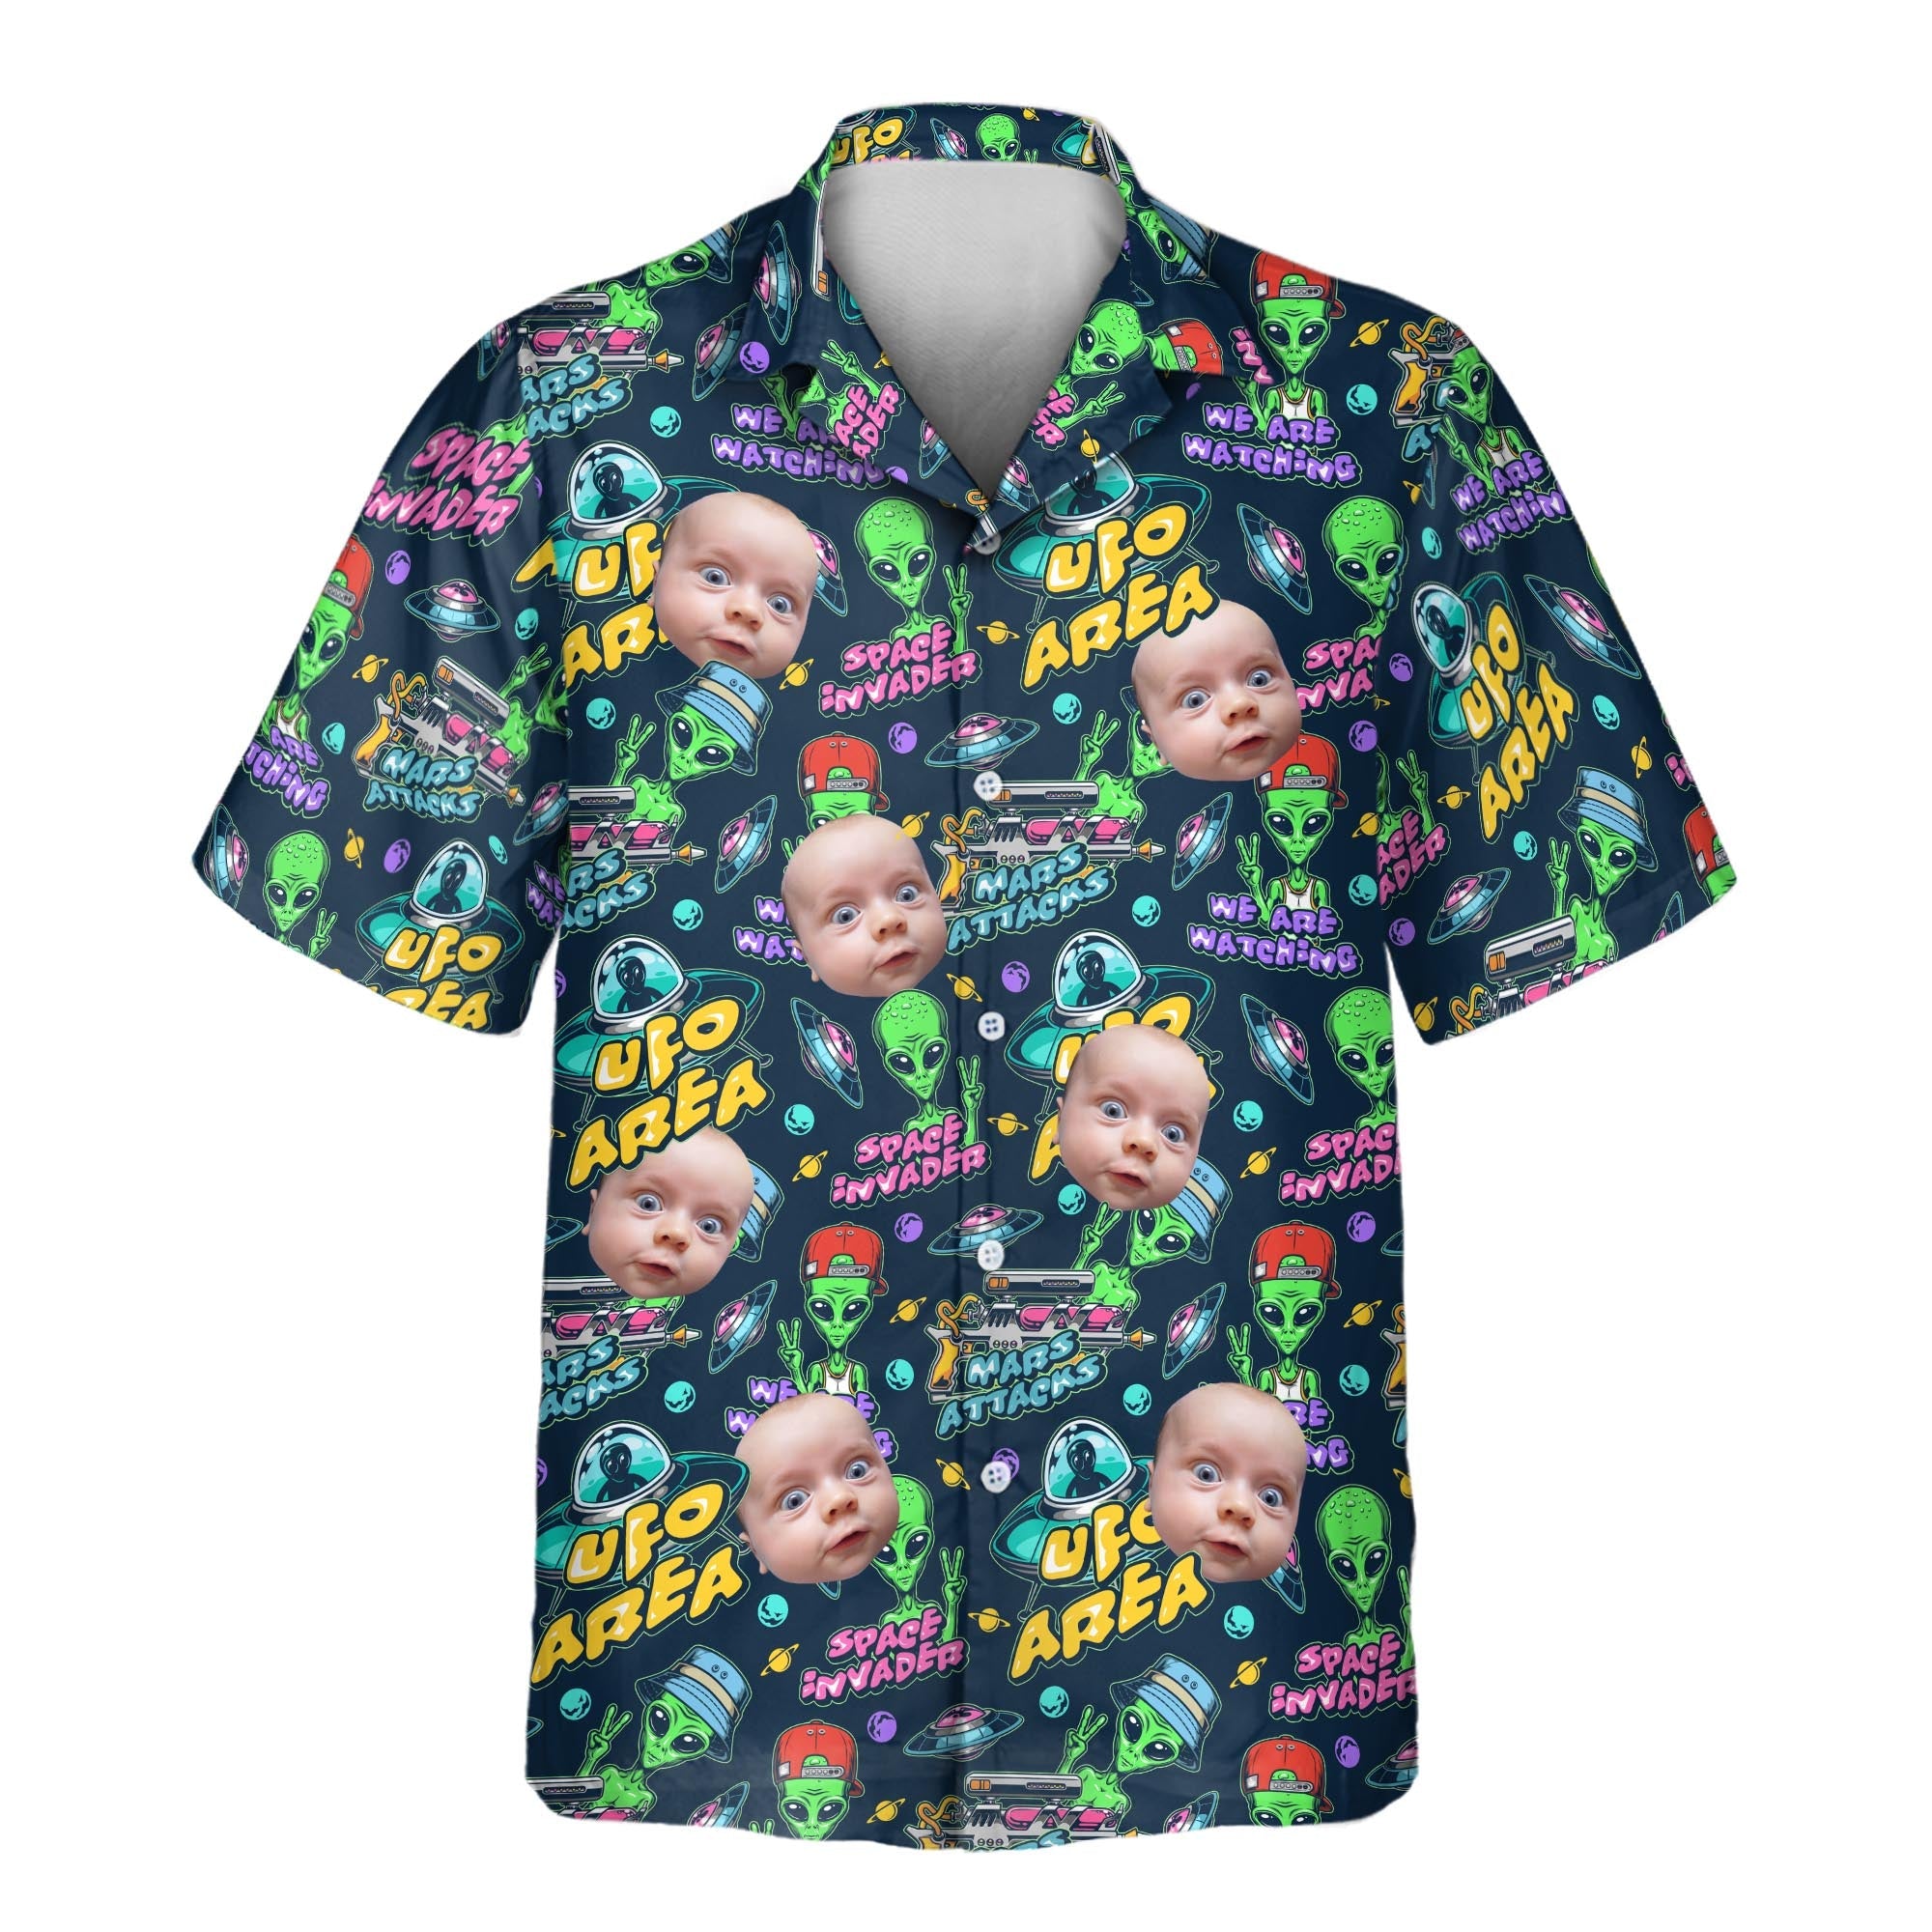
- Photo-based: repeat one face, pet, or memory within a tropical pattern.
- Logo-based: use a brand mark with a limited color palette for teams or events.
- Theme-based: combine a hobby or destination with a print that supports the idea.
4. Keep color and scale readable
Choose two or three supporting colors rather than trying to match everything. Make the main image large enough to recognize. Busy backgrounds can hide a photo or logo, so ask for a proof before production.
5. Check size and production details
Review the size chart, garment fabric, print placement, and delivery timeline. For group orders, collect sizes early and confirm one final design approval point.
Common design mistakes to avoid
Do not use a low-resolution image, stretch a logo, overload the pattern, or wait until the last minute for an event order. A clean design with a clear focal point is usually more memorable.
Related guides
For material choices, see best fabrics for custom Hawaiian shirts. If the shirt is a present, read personalized Hawaiian shirt gift ideas.
Plan the design before choosing decorations
The most successful personalized Hawaiian shirt designs have a clear hierarchy: one focal subject, one supporting pattern direction, and a limited color system. Before uploading an image, decide what the shirt should communicate. Is it a birthday joke, a pet tribute, a family-trip keepsake, a team identity, or an everyday shirt with a subtle personal detail? The answer determines how bold the print should be.
Write one sentence that describes the design. If that sentence has five unrelated ideas, simplify it. A shirt with one readable story usually looks better from a distance and remains wearable after the event.
Prepare photos and logos correctly
Image quality controls print quality. Use the original camera file whenever possible. A well-lit photo with a defined subject and uncluttered background is easier to repeat in a pattern than a dark screenshot or a tiny image copied from social media. For a logo, use a vector file such as SVG, AI, EPS, or a high-resolution transparent PNG when available.
- Do not enlarge a small, blurry image and expect it to become sharp.
- Keep faces, pets, or key objects large enough to recognize at shirt-print scale.
- Remove an unwanted background only when it improves the pattern; a clean background can sometimes be useful.
- Check that you have permission to use the image, logo, or artwork.
Choose a pattern layout
Most personalized shirts work best with a repeat pattern rather than one oversized image centered on the chest. Repeating a subject at a planned scale helps the print look intentional across the front, back, sleeves, and seams. A large single photo can work for a special novelty design, but it is more vulnerable to buttons, folds, and cropping.
Consider three common approaches. A small repeat feels more subtle and wearable. A medium repeat gives a clear personal effect without overwhelming the shirt. A large repeat makes an expressive party or gift design, but needs more careful proofing to avoid awkward crops.
Use color with purpose
Start with two or three supporting colors drawn from the image or the occasion. If the photo is busy, choose a quieter background color. If the logo is simple, a brighter floral or tropical-inspired background can add energy. Contrast matters: a dark subject on a dark background can disappear, while too many saturated colors can compete for attention.
Think about the wearer as well as the screen. A color that looks vivid on a monitor may print differently on fabric. The proof is the point to check overall balance, not just whether the uploaded file is technically accepted.
Review a proof like a production document
Do not treat the proof as a formality. Read every word, inspect every face, and zoom out to see how the repeat looks across the garment. Check whether the key image sits on a button placket or seam, whether the background leaves enough contrast, and whether the pattern direction is consistent. For a group order, choose one person to consolidate feedback and provide final approval.
Ask these questions before approving:
- Are names, dates, and spelling correct?
- Is the subject recognizable at normal viewing distance?
- Are important parts cropped by buttons, pockets, or seams?
- Does the scale suit the wearer and occasion?
- Does the file reflect the final size, fabric, and shirt style selected?
Choose the garment with the design in mind
Fabric changes the way a print appears and how the shirt feels. Rayon may create a softer drape, cotton can feel breathable and familiar, and polyester blends can suit detailed all-over color. The right choice depends on climate, care expectations, and intended use. Read our fabric guide before making a final decision.
Fit matters too. Check the size chart before designing for a group. A pattern that looks balanced on a medium size needs to work across the full range, so avoid putting an essential detail in only one narrow part of the garment.
Design for the occasion—and for repeat wear
A family reunion or bachelor weekend can support a bold joke; an office event may need a cleaner pattern and a restrained logo. If the goal is a gift, use a subject with real meaning to the recipient and a color palette they would actually choose. Our guide to personalized Hawaiian shirt gifts can help with that decision.
For a more general fit-and-style decision, see how to choose the right Hawaiian shirt style. Those articles serve different questions: this guide focuses on artwork and proofing, while the style guide focuses on the finished outfit.
Frequently asked questions
What image resolution do I need?
Use the largest original image you have. The printer or manufacturer can confirm a minimum file requirement for the exact garment and print method.
Can I use several photos?
Yes, but keep one as the focal point. Too many equally important images create a busy pattern that is difficult to read.
Should I add text?
Use short text such as a name, date, or event phrase. Check spelling and make sure it remains readable when repeated across the fabric.
Key takeaway
Begin with one meaningful idea, use a clear source image, keep the print balanced, and approve a proof before production.
Tags:
Previous
A Strategic Guide to Launching Your Custom Hawaiian Shirt Business
Next
Can I Wear a Hawaiian Shirt Golfing?
Related articles
-
Sep 25 2026